
SmartAlbums Proofing: Add a title, password, and welcome message
Before you publish a proof, you can name it, protect it with a password, and add a welcome message for your client.
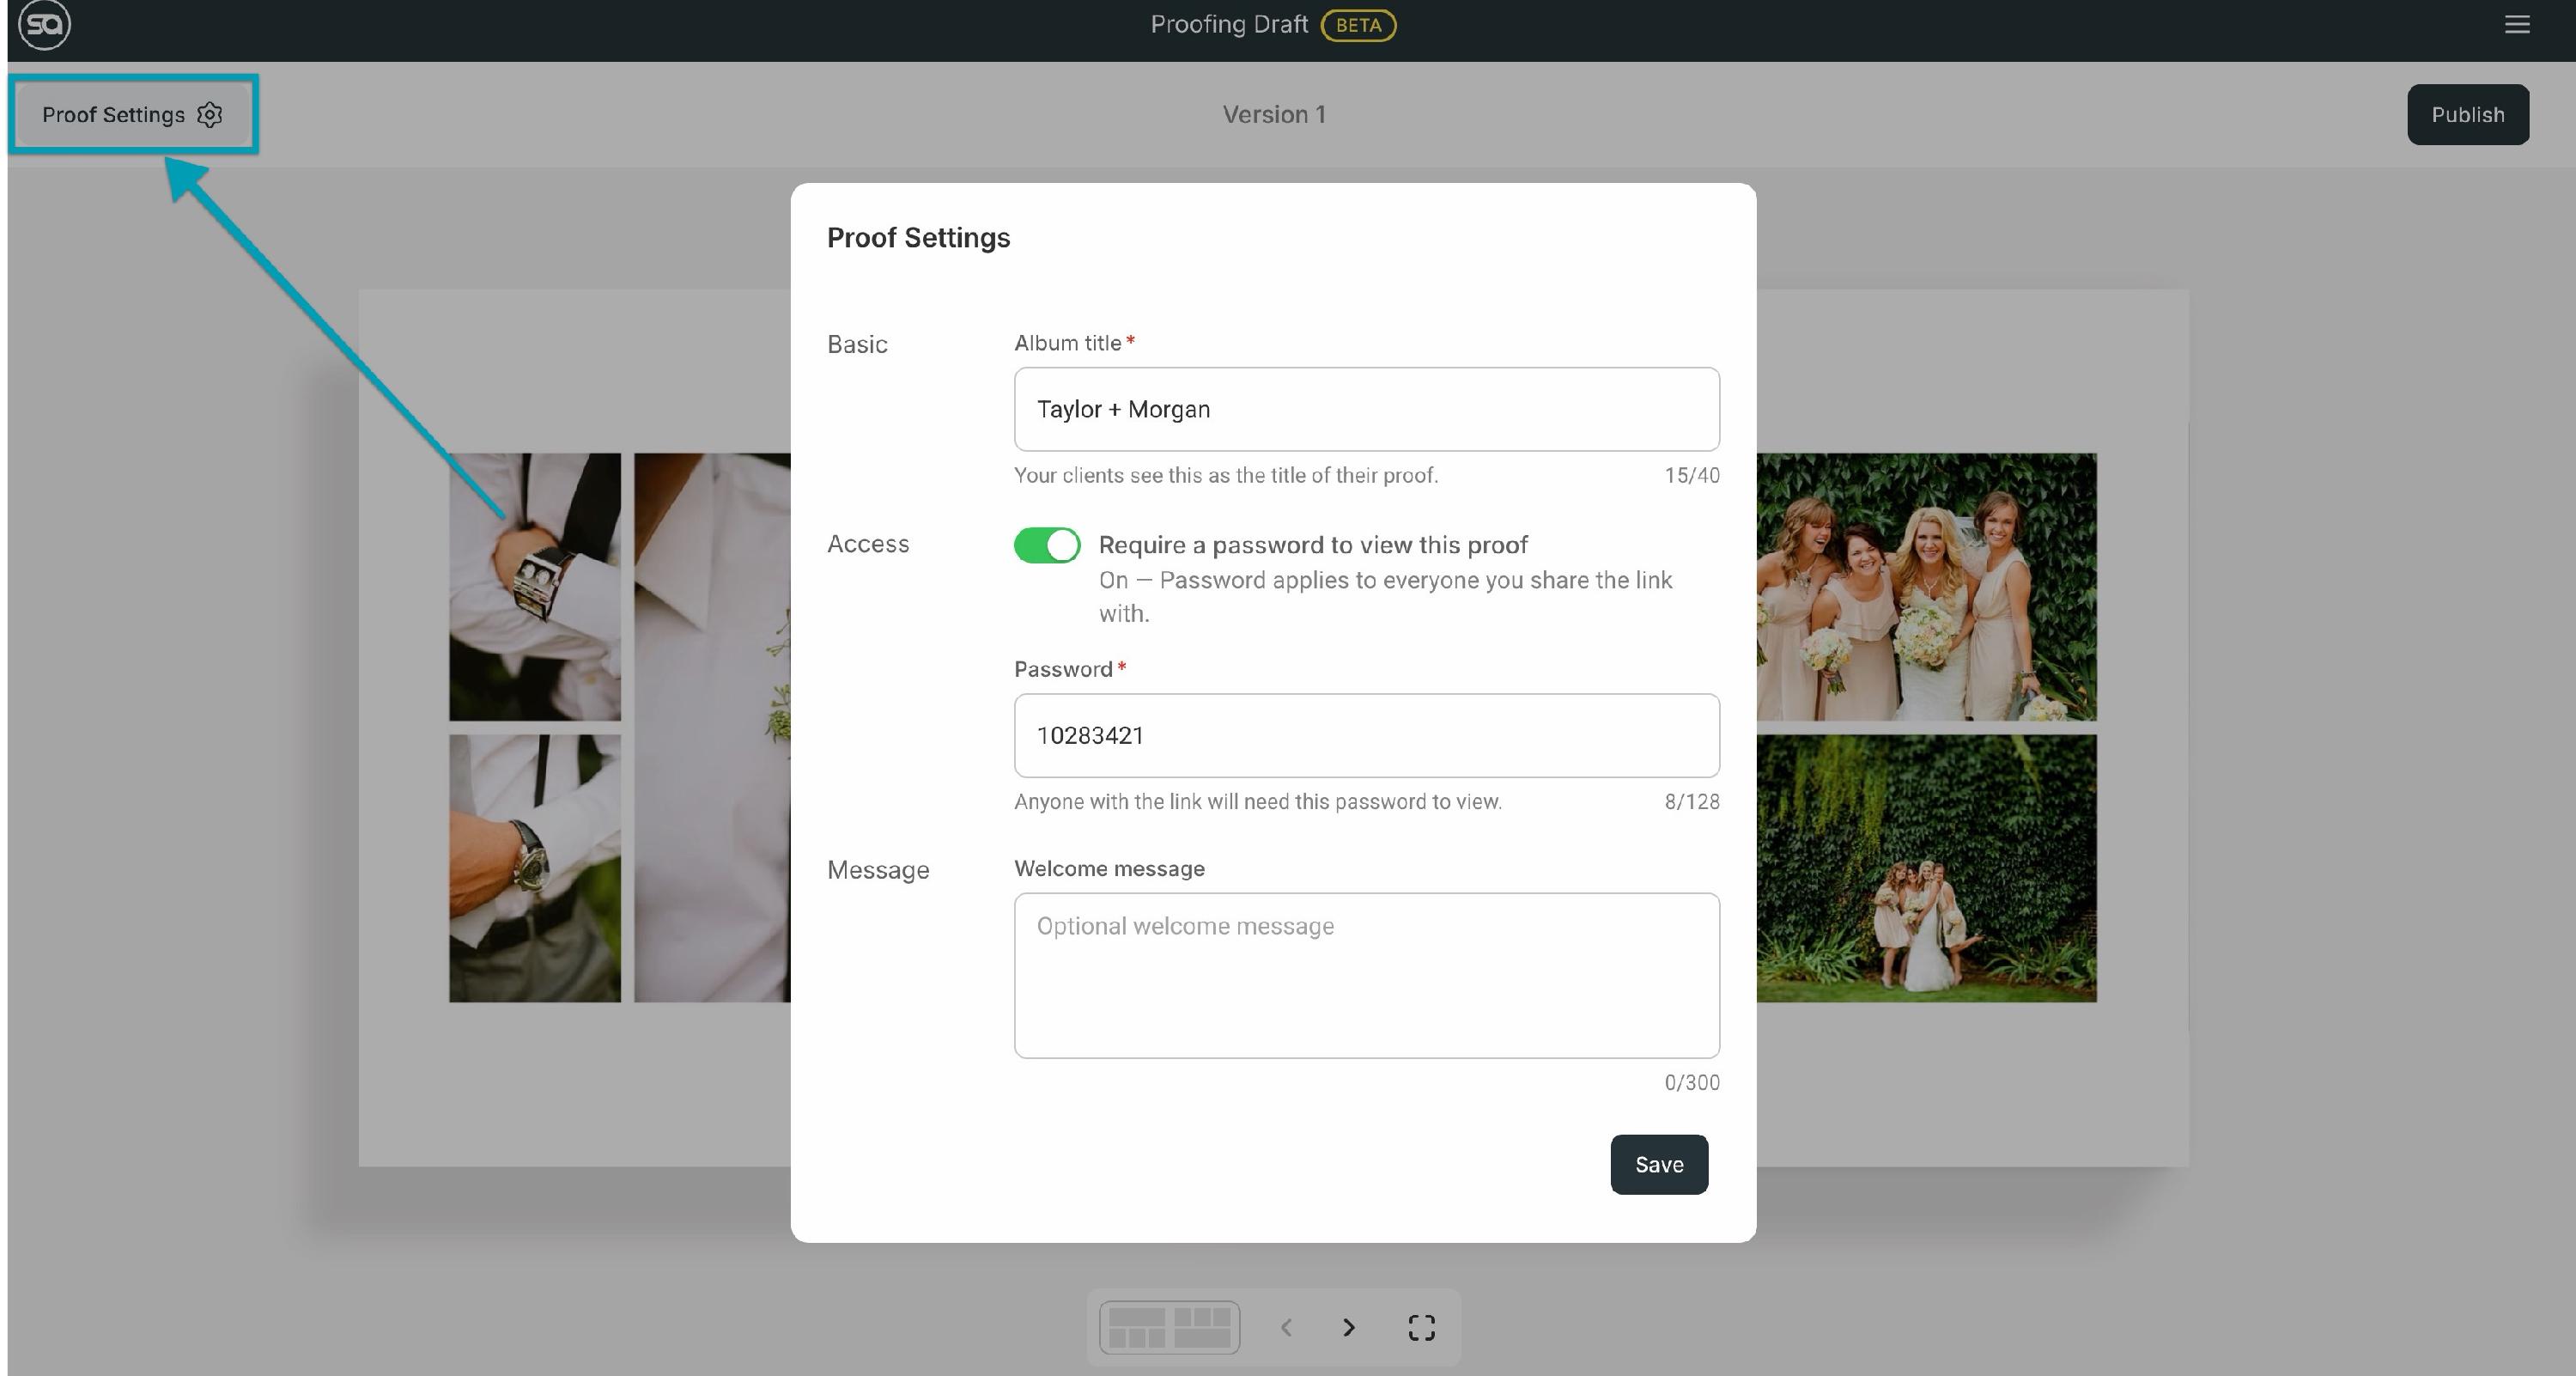
- On the proofing page, click Proof Settings in the upper-left corner.
- Under Album title, enter the title your client will see, such as "Taylor + Morgan". This field is required and can be up to 40 characters.
- To require a password, turn on Require a password to view this proof.
- Under Password, enter a password.
- Under Welcome message, enter an optional message of up to 300 characters. Your client sees it when they open the proof.
- Click Save.
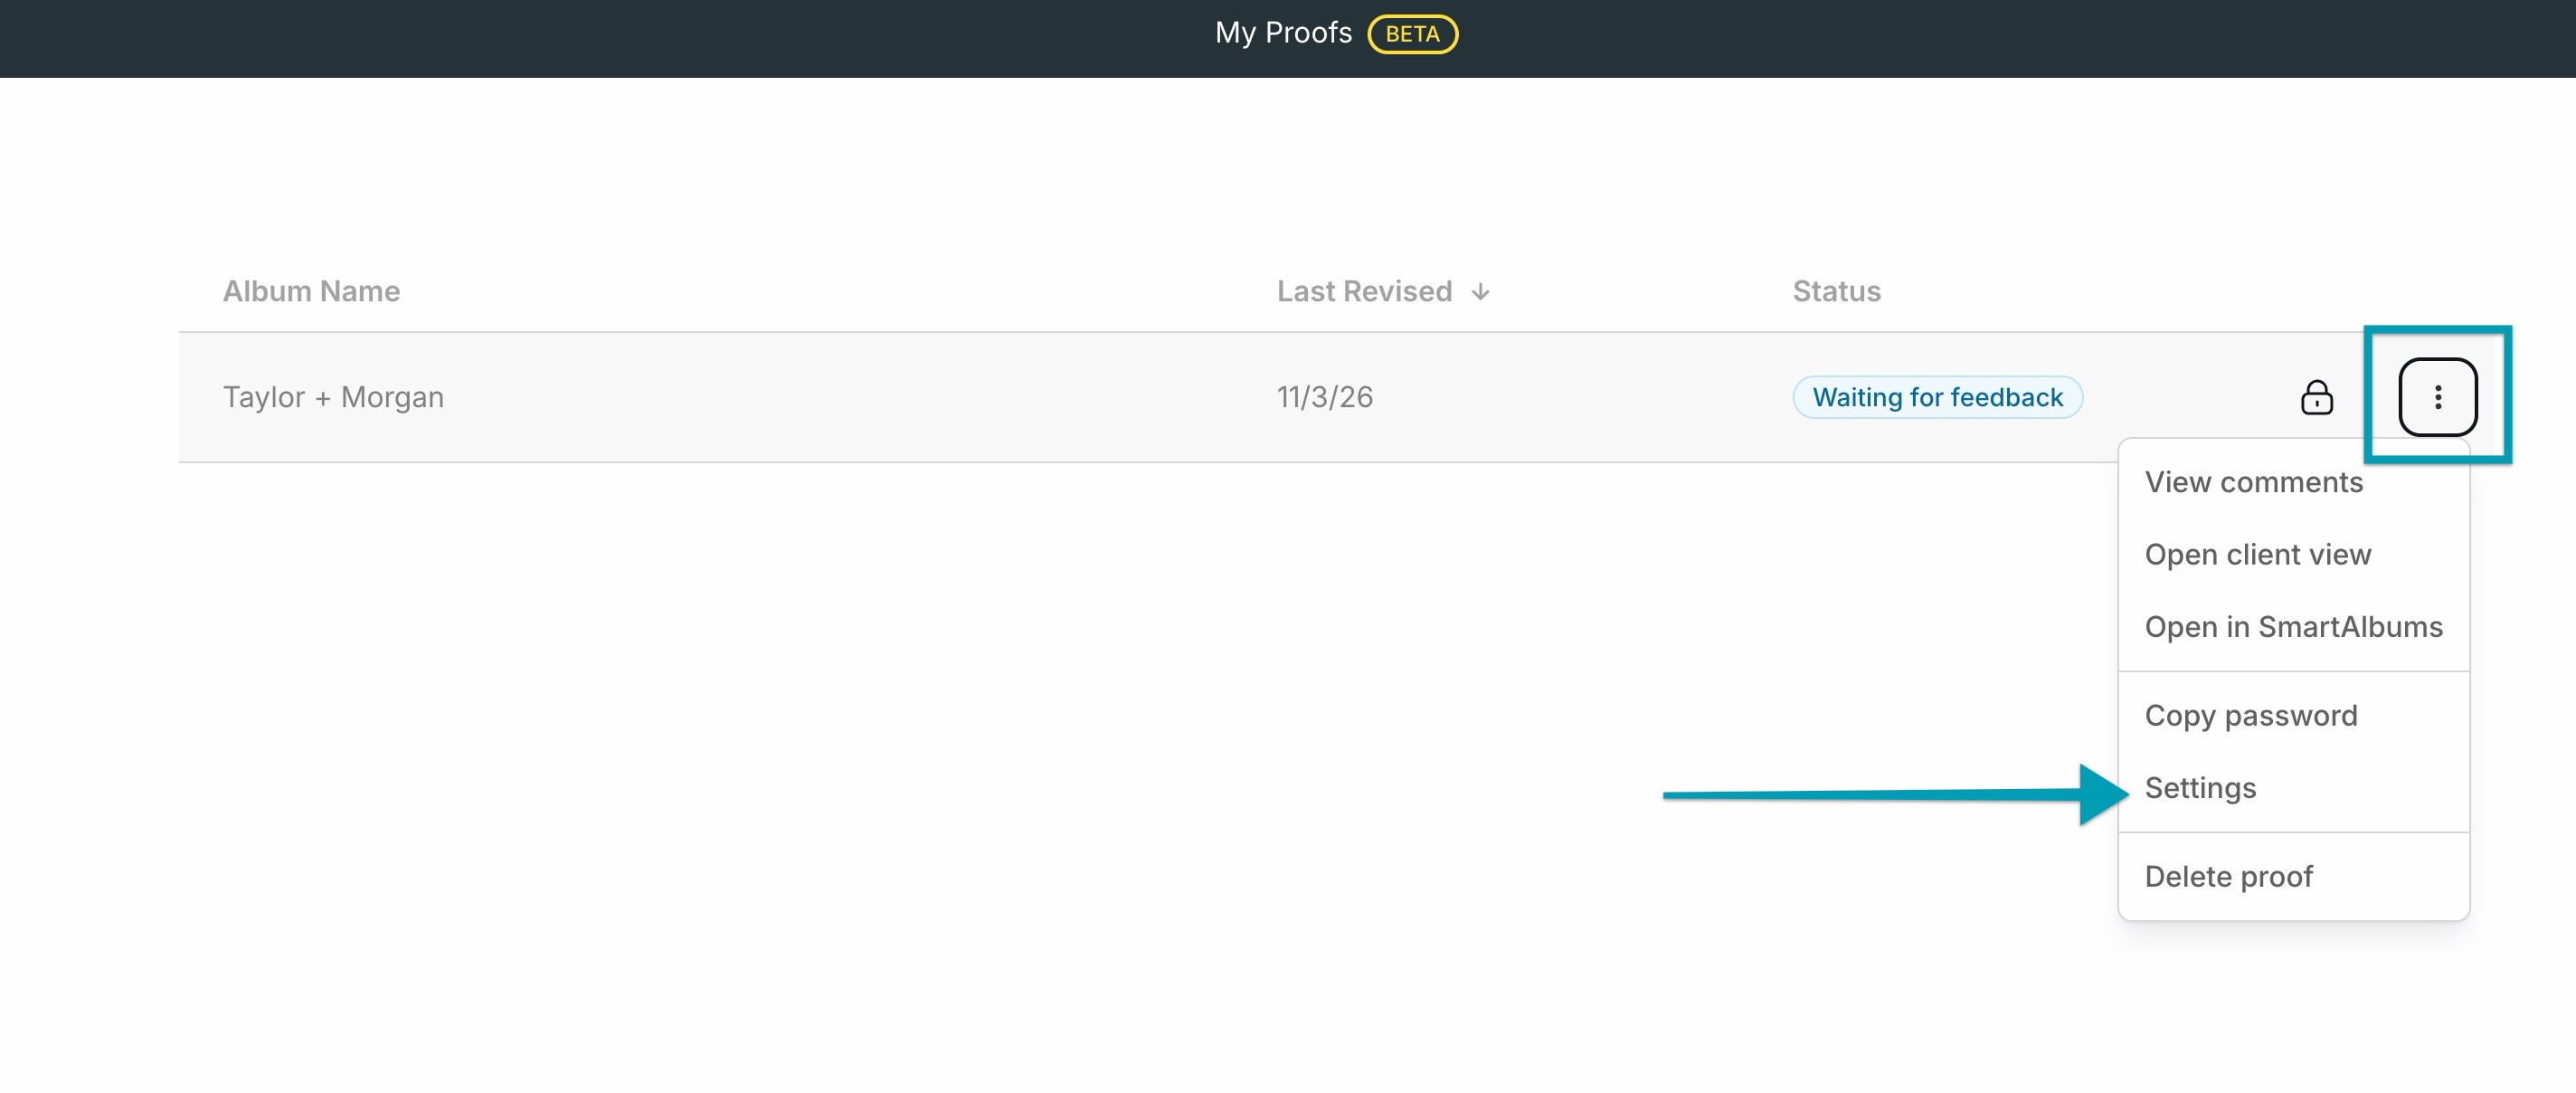
To change these settings later, open My Proofs in SmartAlbums (File > SmartAlbums Proofing > My Proofs), click on the three dots next to the proof, and select Settings.
Note: The password applies to everyone you share the link with, so send both the link and the password to your client.